A water heater is an essential unit found in every house in order to have the right amount of hot water circulation in showers, doing dishes, and for other domestic use. In case if your heater stops working occasionally, you must know the basic step which is how to test a water heater thermostat and to repair it if required.
What is a Water Heater Thermostat?
The thermostat is the central heating element in the heater that warms the water. There are two of them actually, one thermostat controls the water temperature of the upper water tank, whereas the lower thermostat warms the newly entered cold water. If you are not getting hot water, it means the thermostat is not working properly.
In order to check the functionality of the thermostat, you either call for help or examine it yourself.
To provide our readers with ease, in this article, we have mentioned a step-by-step guide for you to check the thermostat yourself.
How to test Water Heater Thermostat; 10 Steps Guide
In order to test a thermostat, you will need two things. First of all, you will require the tools to operate like a screwdriver and a digital multimeter, and the second thing, the most important one is the proper guidance. For a smooth process, here are the steps for how to test a water heater thermostat. Let’s give it a quick read.
1. Turn off the Power
Whether you have an electric or gas water heater, it is mandatory to cut off the power supply in order to ensure safety. Turn it off and double-check it. secondly, locate the breaker and ensure that it is off.
2. Reach the Thermostat
When you move to your heater, you will notice two different panels: one higher up on the unit and one lower down. These panels cover the thermostat and its units. Use the flathead screwdriver to unscrew the bottom and lower access cover. On the inner side, there will be insulation with the cutout flap for the thermostat.
3. Flip the cutout flap and remove the cover
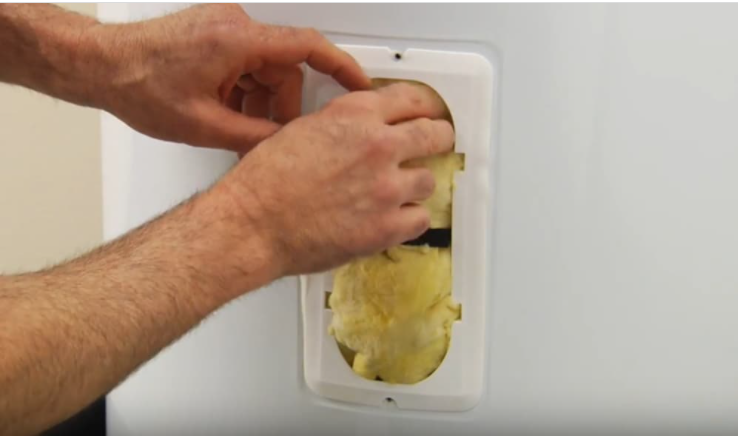
Flip the cutout up or down. You can do it according to the way it was cut. Either way, ensure that it is not blocking anything. You can also stick that flap away with the help of tape. Then remove the plastic cover that rests on the top of the thermostat. With the help of a screwdriver, you can take it off and place it somewhere safe.
4.Set up multimeter
Set the multimeter dial to the lowest ohm of resistance.
5. Check the reset button
The upper thermostat will have a reset button. It goes off if the water in the tank overheats. It can happen for several reasons. It is also called “tripping the power”. You can also rest the rest button by pushing it if it is required.
How To Test Water Heater Thermostat
6. Disconnect Power Wires
This step is necessary, even if you turn the power off and the unit has no power running through it. It is mandatory to disconnect the power wires to isolate the thermostat. For convenience, you can make a note of the orientation of the wires. Afterward, use the screwdriver and unscrew the terminals and release the wires. Do this for both thermostats.
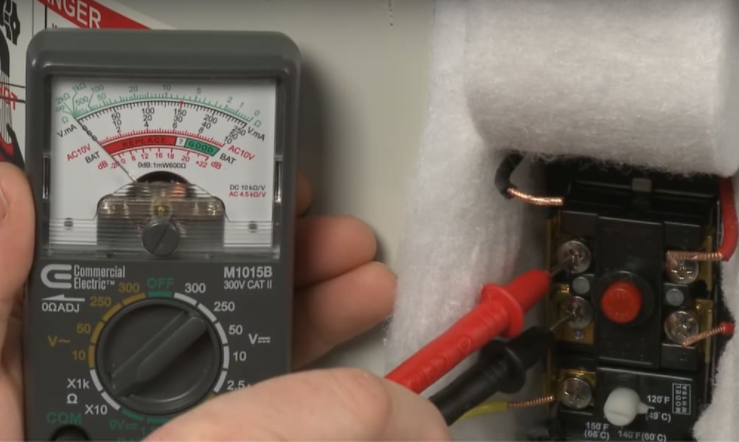
7. Find out the Integrity of the Upper Thermostat
To do this; you need to place the multimeter lead on the reset terminal. This should be placed right next to the reset button. Now, move the second lead to the left-side terminal. Ensure to keep the first lead on the reset terminal as you do this. Similarly, note down the multimeter reading. If it reads 1, your upper thermostat has no continuity and requires replacement. However, if it is working, it should read as 0 ohms or near to it. Now move the second lead to the right side of the terminal. Again make a note of your multimeter reading. If it gives 1 read, there will be no electricity. If it reads as zero, you are clear.
8. Ensure if the Water Temperature is Lower or Higher than the Set Temperature
First of all, place the multimeter and lead it on the left common terminal. It can be found on the lower half of the thermostat. Then, move the second lead to the upper heating element terminal. Ensure that the first lead is on the common terminal.
Now, note down the reading. If the water temperature were lower than it should be, the first reading would be 0 ohms or near to it. Move the second lead to the lower heating element terminal and again note the reading. If the water temperature is higher than it is supposed to be, the first reading would be 1, and the second will be zero.
Carefully remember whether the temperature is higher or low as it will require comparison with a lower thermostat.
9. Find out the Integrity of the Lower Thermostat
You need to follow the same steps you followed to check the integrity of the upper thermostat. If the water temperature is less than the temperature it must be, then the reading would be 0 ohms. Conversely, if the temperature is higher than it should be, the reading should be 1.
10. Evaluate the Results
Now you have the readings. If both thermostats are showing different readings, then this indicates that the lower thermostat needs to be repaired or replaced. It is clear that if the upper thermostat temperature is higher than it should be and the lower is less than the required temperature, the lower one is defective.
Conclusion
The water heater is a necessity for daily use so it is better to have a basic knowledge of the unit, most importantly, you must know how to test a water heater thermostat. A thermostat is the heating unit in the heater that helps in warming the water. If you are getting partial or no hot water, it means the thermostat is not working properly. In this article, we have summed up the basic steps that you can perform yourself in order to check if the thermostat is operational.